


The TouchRetouch mod apk offers a quick and easy way to remove unwanted objects from your iPhone photos. Within seconds you can erase power lines, dust spots, skin blemishes, or any other object that you feel is spoiling your composition. In this tutorial you’ll learn how to use the TouchRetouch mod apk to remove unwanted objects from your iPhone photos, allowing you to create cleaner and more striking images.
TouchRetouch mod apk: Introduction
At the bottom of the screen you’ll see the app’s four editing tools – Object Removal, Quick Repair, Line Removal and Clone Stamp. Each of these tools allow you to clean up your images by removing distracting items:
In the following sections you’ll learn how to use each of these four tools to remove a variety of unwanted elements, including people, wires, skin blemishes and small imperfections.
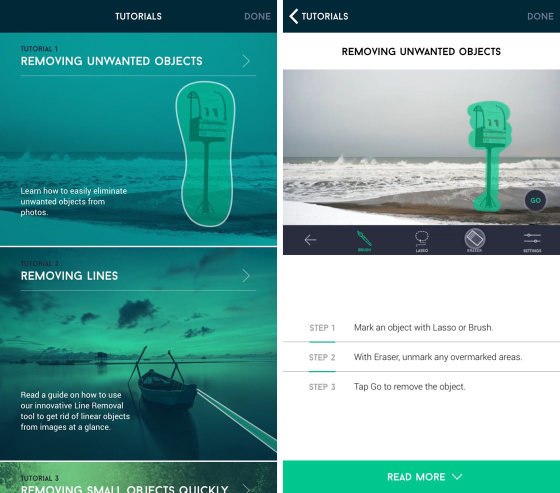
The TouchRetouch mod apk photo retouch app also has some handy tutorials showing you how to use each of the tools. To access these tutorials, return to the app’s home screen by tapping the Home icon at the top left of the screen, then select Tutorials.
Select a tutorial from the list, then watch the step-by-step video at the top of the screen. Tap Read More at the bottom of the screen to view more information about the technique. Tap Done to exit the tutorial screen:
1. Object Removal Tool
In this section you’ll learn how to use the Object Removal tool to eliminate objects from your iPhone photos. You can use this tool to erase unwanted or unsightly elements such as trash cans, street signs, people, trees, furniture, or even whole buildings.
After opening the image you want to edit, select the Object Removal tool at the bottom of the screen. Now you have to decide if you want to use the Brush or Lasso tool to select the object you want to erase:

With the Lasso you only have to outline the object you want to remove. With the Brush you have to brush over everything you want to remove. In some cases you’ll find the Lasso is quicker, and in others you might find it easier to use the Brush – so try out both and see which works best for your situation.
When selecting small objects in a photo, you’ll make a more accurate selection if you zoom in on the picture. Pinch out with two fingers to zoom in, and pinch in with two fingers to zoom out again. You can toggle between 100% zoom and fit-to-screen size by double-tapping the image.
Once you’ve zoomed in, you can navigate to another region of the image by dragging with two fingers.
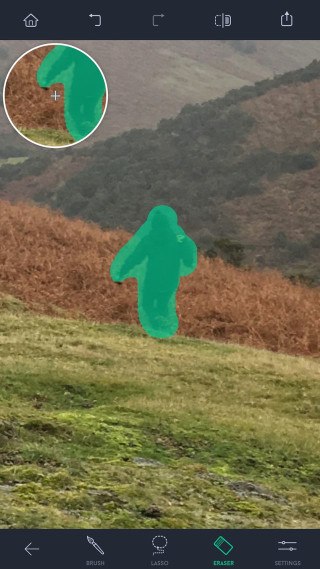
Below you can see that I’ve used the Lasso to draw a continuous line with my finger around the object (the dog) that I wanted to remove. When you release your finger, a green patch will appear over the area that you selected:

Helpfully, the app provides a “loupe” showing a circle with the region of the photo that’s currently obscured by your finger. This makes it possible to see exactly what you’re marking for deletion.
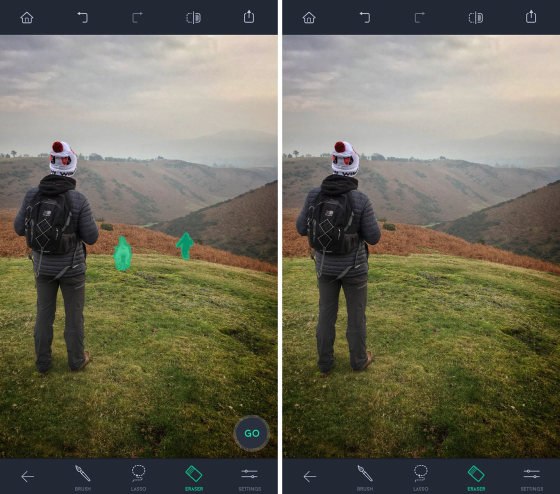
To use the Brush tool, simply paint with your finger over the unwanted content to highlight it in green. In the screenshot below you can see that I’ve used the brush to paint over the person in the distance:
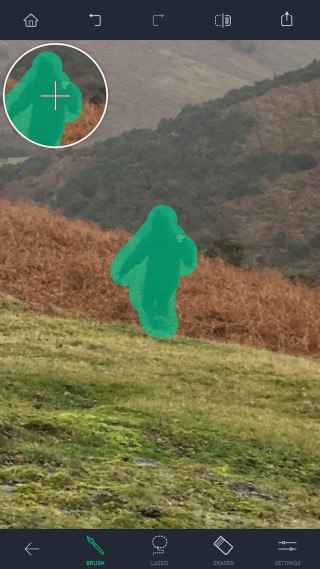
If you need to adjust the size of the brush, tap Settings at the bottom right of the screen, then use the slider to make the brush larger or smaller
If you didn’t select the objects correctly you have two options. You can either undo what you’ve done by tapping the Undo icon (left-pointing arrow) at the top of the screen, then try selecting the object again.
Alternatively, you can use the Eraser tool to unmark any areas that you don’t want selected. Simply tap the Eraser tool at the bottom of the screen, use the Settings option to adjust the size of the eraser if necessary, then brush over the green areas that you don’t want selected:
When you’ve selected the object or objects that you want to remove, tap Go and watch while the app erases the object and replaces it with pixels from the surrounding area:
To save the edited photo, tap the Export icon (up-arrow at the top right), then tap Gallery to save the image to the native Photos app:

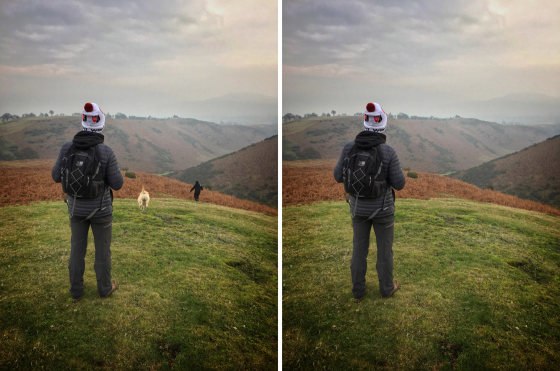
Below you can see the before and after versions of the image. It took less than a minute to erase the dog and person from this photo:
2. Quick Repair Tool
The Quick Repair tool is great for removing objects and blemishes in seconds. You simply select the area you want to remove, and as soon as you release your finger the object will disappear.
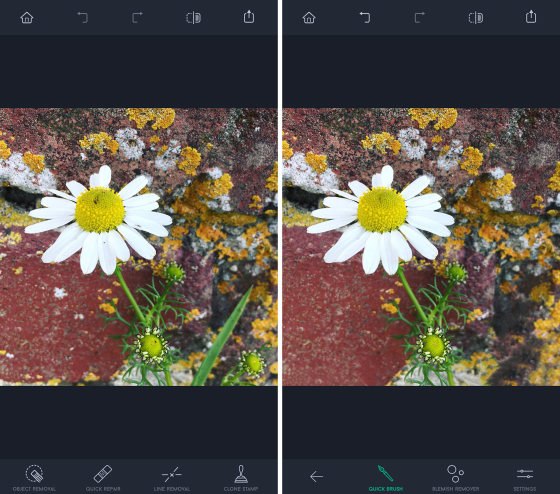
When you tap the Quick Repair tool you have the option to use either the Quick Brush or the Blemish Remover:

The Quick Brush is great for erasing small objects that are easy to select. The Blemish Remover is perfect for removing pimples and skin blemishes in portrait photos, as well as dust spots and other tiny imperfections.
In the screenshots below you can see that I’ve zoomed in and used the Quick Brush to select the boat so that it appears highlighted in green. As soon as I released my finger, the boat disappeared and was replaced by pixels from the surrounding area:
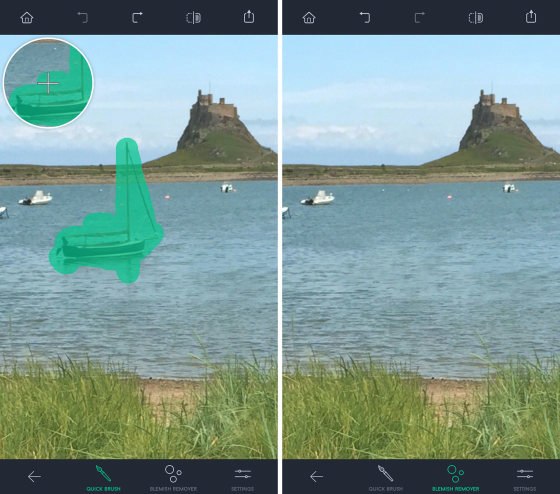
Below are the before and after images showing how I removed the boat and the two people walking along the shoreline:


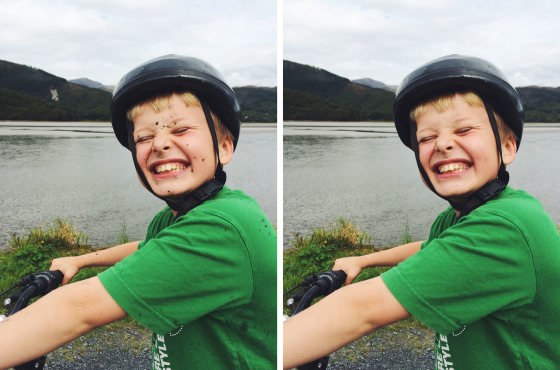
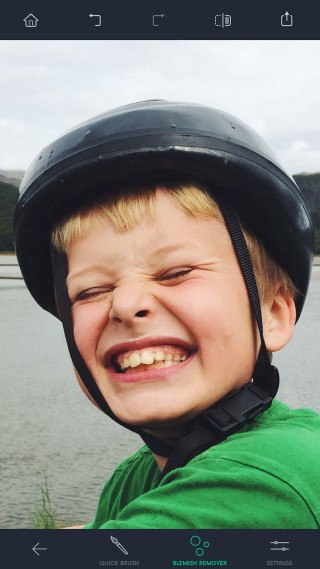
If you’re editing a portrait photo, the Blemish Remover is excellent for quickly removing small skin blemishes. In the example below, the boy had lots of specks of mud on his face:
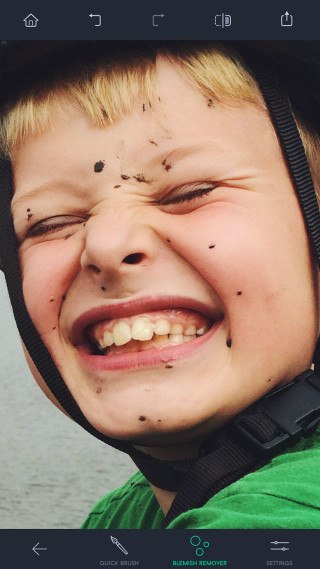
To remove the mud, I selected the Blemish Remover tool at the bottom of the screen. I then simply tapped on a spot of mud, and as soon as I released my finger that mud spot disappeared. I repeated this procedure with all of the mud spots until his face was clean:
When using the Quick Brush and Blemish Remover, keep in mind that you can adjust the brush size by tapping Settings at the bottom right.
3. Line Removal Tool
The innovative Line Removal tool helps you get rid of linear objects such as power lines, telephone wires, utility poles, antennas, etc.
When you tap the Line Removal tool, you have the option to use either the Line Remover or the Segment Remover:
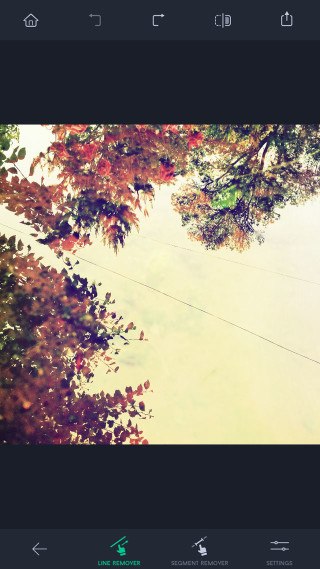
If you want to try and let the app remove a whole line, select the Line Remover tool, then use your finger to trace along a section of the line. When you release your finger, the app will attempt to remove the whole line:
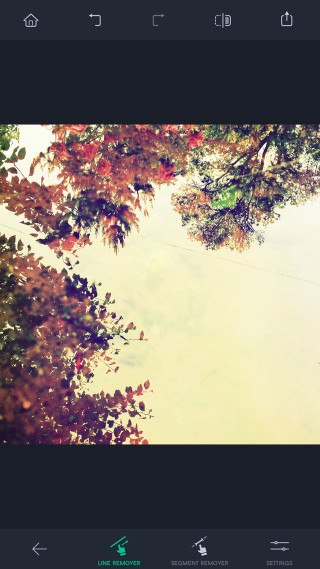
If it doesn’t achieve this to your satisfaction, tap the Undo icon at the top of the screen, then select the Segment Remover tool.
Now use your finger to trace along the entire line (or just the bit you want removing). When you let go, the app will try and remove the selected segment:
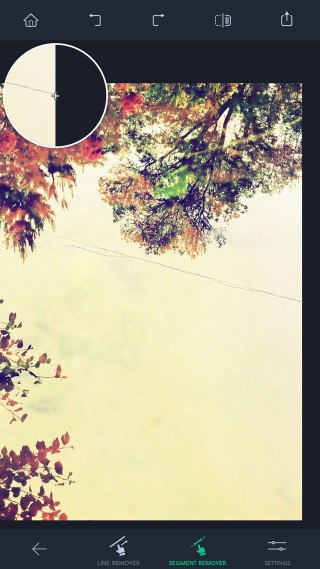
Note that it can sometimes be difficult to get the right result with this tool, and it tends to work best with high contrast lines.
4. Clone Stamp Tool
The Clone Stamp tool lets you duplicate objects or regions so that you can copy pixels from any area of the image to another area. This is useful for both duplicating objects and repairing defects in areas where you’ve removed an object.
When you’ve selected the Clone Stamp tool, ensure the Brush option at the bottom of the screen is selected:
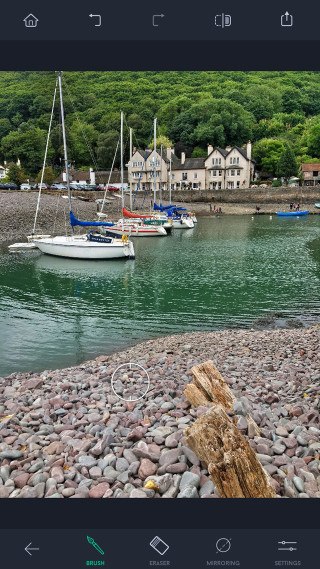
In this example, I’m going to use the Clone Stamp to remove the wooden posts in the foreground by duplicating the pebbles over the top of them.
If you want to adjust the Clone Stamp brush size, hardness or opacity, you can do so by tapping Settings at the bottom right.
When you’re ready, tap on the area of the image that you want to set as your source point, i.e. the area containing the pixels you want to copy. In this case, I tapped on an area of pebbles.
Now use your finger to brush over the area you where you want the cloned content to appear, i.e. the area that you want to replace with the source point pixels.
As you brush over the image, you’ll see that area appear in the “loupe” (large white circle), making it easy to see the area that’s beneath your finger:
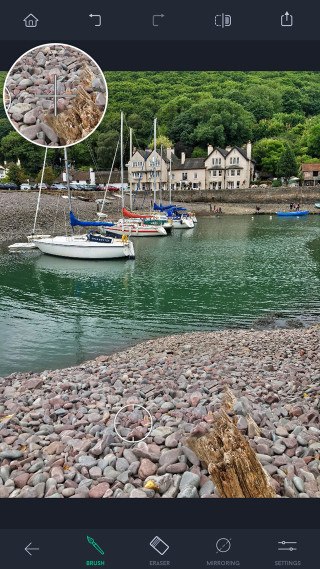
Note that as you drag your finger, the source pointer (indicated by a smaller circle on the image) moves as well. This means that what gets cloned changes as you move the brush.
This might seem counterintuitive, but it’s what makes the tool so powerful as it prevents repetition of the cloned area, creating a more seamless edit:
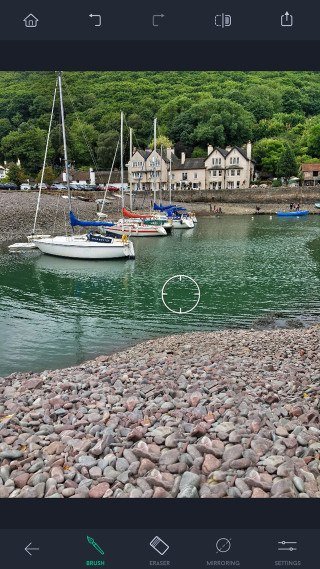
If necessary, you can switch to the Eraser tool at the bottom of the screen to selectively remove any cloning you don’t want to keep.
TouchRetouch mod apk: Conclusion
As you’ve seen from the examples in this tutorial, TouchRetouch mod apk is a powerful app that lets you quickly and easily remove unwanted content from your photos.
From small blemishes and wires to larger more complex objects, the range of tools in TouchRetouch mod apk offers multiple ways to erase areas of an image.
Next time you’re editing a photo, consider whether there are any objects that could be removed to create a cleaner and more pleasing composition. Spending a little time cleaning up your images in TouchRetouch mod apk can make all the difference to your iPhone photos.
TouchRetouch mod apk can be downloaded from Panda helper android.
$$$#101347#$$$
Reference: https://iphonephotographyschool.com/touchretouch/

Comment
Name*
Email*
Your email address will not be published. Required fields are marked *